Dom Tower Photos: A Visual Journey
Utrecht's Dom Tower, a majestic sentinel piercing the Dutch sky, offers an endless canvas for photographers. Every twist of the city's canals, every cobbled alleyway, seems to frame this gothic giant in a fresh light. If you are hoping to capture truly stunning Dom Tower photos, you are in for a treat, but also a challenge, as its sheer scale and intricate details demand a thoughtful approach. This guide is designed to help you discover the most iconic viewpoints and some lesser-known spots, understand how different times of day change the mood of your picture of Dom Tower, and share a few practical tips to make your visual journey as rewarding as possible. We'll explore everything from the classic postcard shots to unique angles you might miss if you don't know where to look.Book your dom tower experience:
Finding the Classic Dom Tower Photos
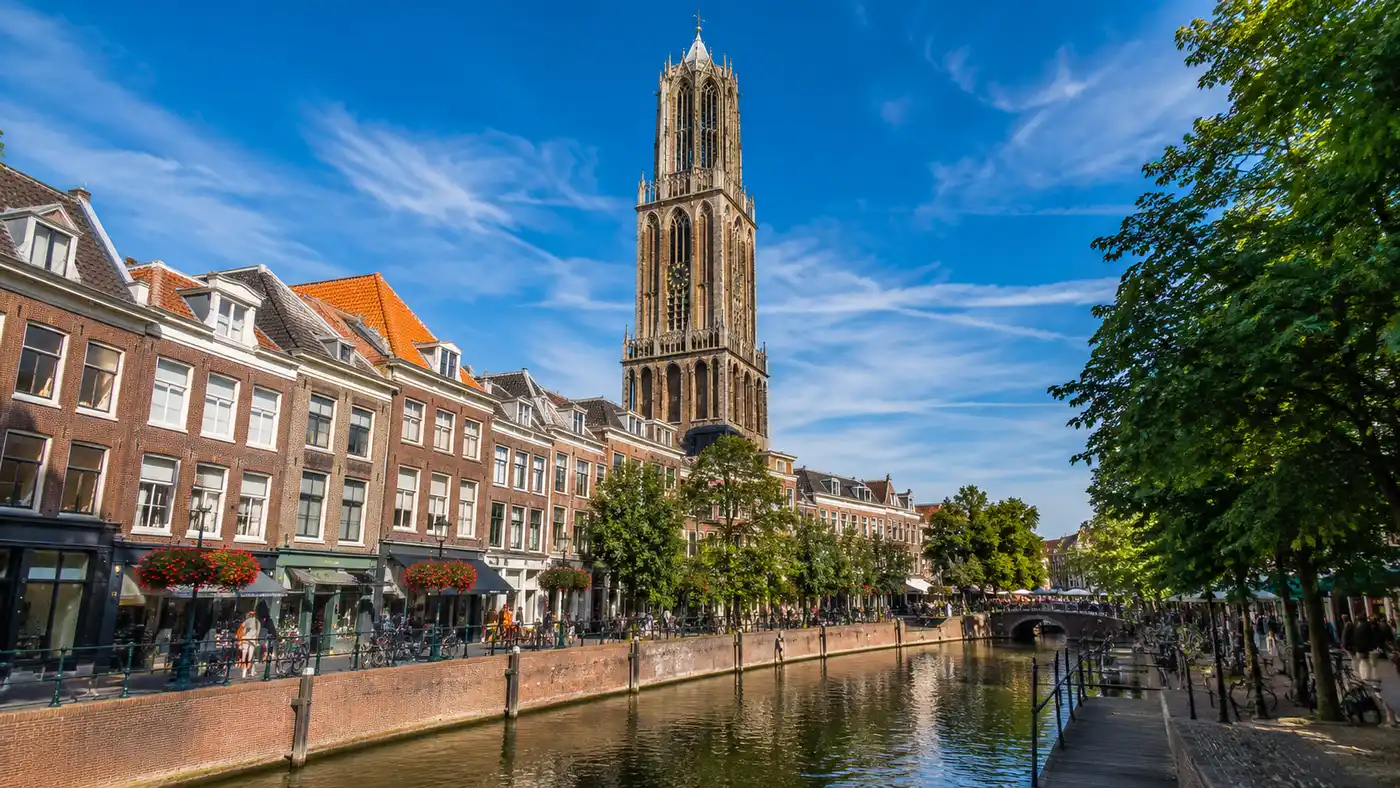
Honestly, the most famous views of the Dom Tower are famous for a reason. They work. Your first stop should probably be Domplein itself, the large square right at its base. Standing here, you get a real sense of its imposing height. Try to capture the entire structure, maybe with a wide-angle lens, letting the surrounding Domkerk cathedral ruins frame the base a little. Early morning is fantastic here; the square is usually empty, and the light is soft, hitting the tower's east face beautifully. Another absolutely essential spot for a classic picture of Dom Tower is along the Oudegracht. This ancient canal, unique with its wharves and cellars at water level, provides incredible reflections. Walk along the canal, especially near the Stadhuisbrug or Winkel van Sinkel. You can often get the tower, the canal, and some charming canal houses all in one frame. The reflections on a calm day are just magic. Don't forget the bridges crossing the Oudegracht. Each one offers a slightly different perspective, a new leading line for your eyes. The Bakkerbrug, for example, gives a lovely view looking south towards the tower, often with boats moored below. I think taking your time to wander and just see what composition speaks to you is key here.Discovering Unique Perspectives for Your Dom Tower Photos
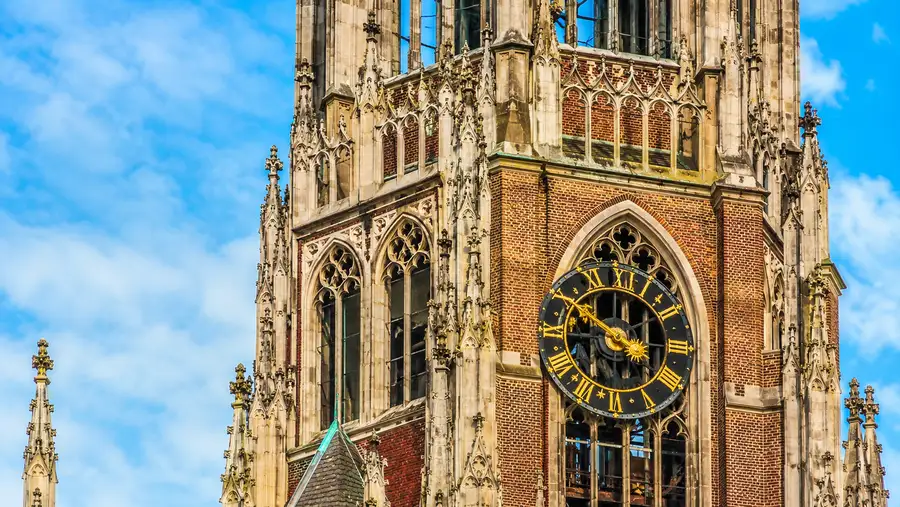
While the classics are great, sometimes you want something a bit different, a picture of Dom Tower that stands out. Venture into the narrow streets and courtyards around the tower. Places like the Paushuize courtyard or the alleyways off the Servetstraat can offer unexpected framed shots, often with charming brickwork or hidden gardens in the foreground. These spots can feel like stepping back in time, adding a layer of history to your photographs. Another fun approach is to look for reflections in modern buildings. Utrecht has a mix of old and new architecture, and sometimes you can catch a striking, distorted image of the Dom Tower in a glass facade. It's a bit of a treasure hunt, but the results can be really abstract and cool. Maybe try the newer buildings around Neude square or even some of the shop windows on Steenweg.Pro tip: Look up! The tower's intricate details - the gargoyles, the clock faces, the delicate spires - are often overlooked when people try to capture the whole thing. Zoom in on these smaller elements for a compelling, unique picture of Dom Tower that tells a different story.
Capturing the Dom Tower in Different Lights
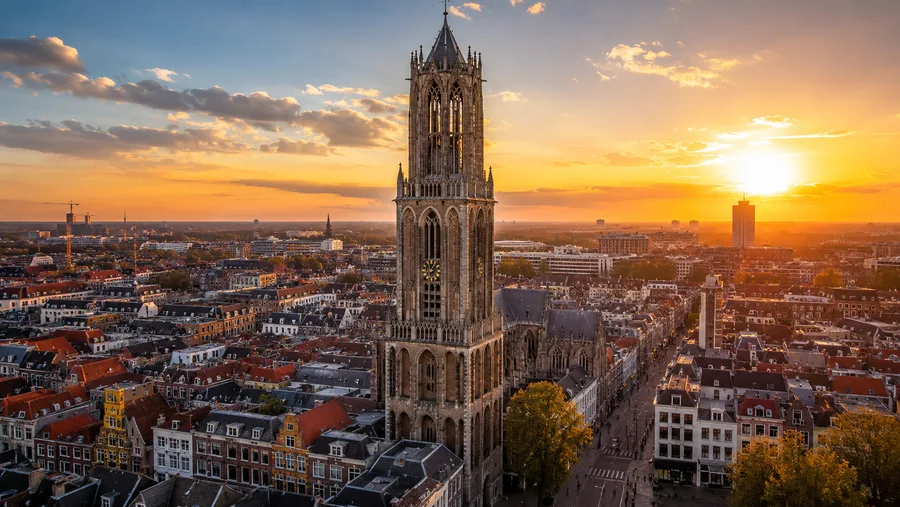
The time of day dramatically impacts the mood and appearance of your Dom Tower photos. Golden hour, the hour after sunrise and before sunset, is a photographer's dream. The warm, soft light bathes the tower in a beautiful glow, creating long shadows and highlighting its textures. Sunrise, in particular, often comes with fewer crowds, making it easier to compose your shots without people getting in the way. Blue hour, the twilight period just after sunset or before sunrise, also offers fantastic opportunities. The sky turns a deep, rich blue, and the city lights begin to twinkle, contrasting beautifully with the illuminated tower. Night photography can be challenging, but a long exposure shot of the Dom Tower, with light trails from passing cars on the streets below, can be incredibly dramatic. Weather also plays a huge role. A misty morning can give the tower an ethereal, mysterious quality, while a dramatic stormy sky provides a powerful backdrop. Don't be afraid to shoot on cloudy days; the diffused light can be great for capturing details without harsh shadows. I think some of my favorite pictures of the Dom Tower were taken on slightly overcast days.- Best Times for Photography:
- Sunrise: Soft light, few crowds, ideal for classic shots on Domplein or along the canal.
- Golden Hour (pre-sunset): Warm glow, dramatic shadows, perfect for highlighting architectural details.
- Blue Hour (post-sunset): Deep blue sky, city lights beginning to shine, great for atmospheric shots.
- Night: Illuminated tower, long exposures for light trails, very dramatic.
- Misty or Cloudy Days: Diffused light for detailed shots, adds a mysterious atmosphere.
Book your dom tower experience:
Technical Tips for Better Dom Tower Photos
Getting a good picture of Dom Tower isn't just about finding the right spot; a few technical considerations can elevate your shots. For those grand, wide-angle shots, consider using a lens around 16-35mm on a full-frame camera, or a similar equivalent. This helps you capture the entire tower without having to stand miles away. When shooting at night, a tripod is almost essential to keep your camera steady during long exposures. Composition is key. Use leading lines - the canals, the cobblestone streets, the edges of buildings - to draw the viewer's eye towards the tower. The rule of thirds can also be applied, placing the tower off-center for a more dynamic image. Look for foreground elements too; a bicycle parked just right, a quaint lamppost, or even some blooming flowers can add depth and interest to your shot.Note: Crowds can be a real issue, especially in peak season or during popular events. If you can't get to a spot early, try shooting from a slightly elevated position, or use a shallow depth of field to blur out distracting backgrounds. Sometimes, waiting a few extra minutes for a gap in the foot traffic makes all the difference.
Beyond the Exterior - Dom Tower Photos from Within and Above
While most people focus on the exterior, some of the most spectacular Dom Tower photos come from unique vantage points. Climbing the tower itself is an experience not to be missed, and it offers unparalleled views *of* Utrecht, with the tower's own architecture framing the city below. You'll see the intricate rooflines of the Domkerk, the winding canals, and the sprawling urban landscape. It's a fantastic opportunity for wide panoramic shots, and you can learn more about the ascent by reading "Climb the Dom Tower: Your Guide to the Ascent". The climb involves a few stops inside the tower, including the Bell Room and the Chapel of Michael. These interior spaces offer their own photographic potential, with ancient stone walls and glimpses of the city through narrow windows. It's a different kind of picture of Dom Tower experience, focusing on the journey as much as the destination. Another fascinating, albeit subterranean, perspective comes from DOMunder. This archaeological experience beneath Domplein allows you to explore the Roman origins and medieval history of Utrecht. While you won't get a direct picture of Dom Tower from here, you can capture the foundations and the history beneath its shadow, which adds a profound context to any visual story you're trying to tell about the tower. You can discover more about this unique experience at "DOMunder: Utrecht's Underground Experience".- Photo Opportunities When Climbing the Tower:
- City Panoramas: Breathtaking 360-degree views of Utrecht from various platforms.
- Architectural Details: Close-ups of the tower's upper sections, spires, and flying buttresses.
- Bell Room: Capture the massive bells and carillon mechanism.
- Glimpses through Windows: Framed shots of the city through historical openings.
- Interior Shots: The ancient stone stairwells and chambers offer their own visual appeal.
Frequently Asked Questions about dom tower photos
What's the best time of year to take Dom Tower photos?
Spring and autumn are often ideal. Spring brings blooming flowers and trees, adding color, while autumn offers beautiful foliage. Summer can be crowded, but the long daylight hours give more flexibility. Winter can provide stark, dramatic shots, especially if there's snow.
Can I use a drone for aerial Dom Tower photos?
No, drone use is generally restricted in urban areas of the Netherlands, especially around historical monuments and busy public spaces like Domplein, due to safety and privacy regulations. Always check local drone laws before flying.
Are there any restrictions on photography inside the Dom Tower during a tour?
Generally, photography is allowed during the Dom Tower climb, including the interior sections and from the various platforms. However, flash photography might be discouraged in certain areas to preserve historical elements or avoid disturbing other visitors. Always follow your guide's instructions.
Quick Reference
- Height: 112.5 meters (368 feet)
- Construction Started: 1321
- Number of Bells: 50
- Floors: 13 levels
Book your dom tower experience:
My Take on Capturing Utrecht's Icon
Utrecht's Dom Tower is more than just a tall building; it's a symbol, a landmark, and a constant presence in the city's skyline. Taking its picture isn't just about pointing and shooting. It's about finding your own connection to its history, its grandeur, and its place in the vibrant life of Utrecht. Whether you're a seasoned photographer with all the gear or just snapping away with your phone, I hope these tips help you capture a picture of Dom Tower that you'll cherish. So grab your camera, wander the streets, and let the tower inspire your lens.Read more about dom tower.